

Hello everyone, and welcome to my first tutorial! So since I have already posted about the nail polish earrings and rings I make, I thought it would be fun to write a tutorial to show you guys how I make these. This is my first tutorial ever, so I hope it makes sense. If anything's unclear, don't hesitate to ask me!
Nail polish jewelry is so easy to make, and with only a few simple supplies you can create amazing and unique pieces of jewelry. I will show you how to make both rings and earrings in this tutorial.
Tips before starting:
- If you are like me, you will get nail polish on your fingers/nails. If you don't want to ruin your manicure, make the jewelry with naked nails.
- Be sure to make the jewelry on paper, or an easy to clean surface.
- Have nail polish remover and cotton wads/balls ready.
Tutorial after the jump!

What you will need:
- Nail polishes of your choice
- Clear glass cabochons
- Ring bases
- Earrings posts + backings
- Clothespins
- Superglue
I got my cabochons, ring bases and earring posts off Etsy and eBay. Just search around a bit - there are tons of different models and shapes. Pick whatever you like! I personally like small and simple, so that is what I will be using.
Also, the superglue I use is either UHU or Pattex, but I'm sure any brand works fine.
First, I will show you how to make a glitter ring.

To make a ring, you will need a clear glass cabochon and a ring base. It is very important that when ordering your supplies, you make sure your cabochon will fit in the ring base. For the tutorial, I am using a 16mm blank ring base with a 16mm cabochon, so I know it will fit perfectly. Pay attention to this when purchasing your materials.

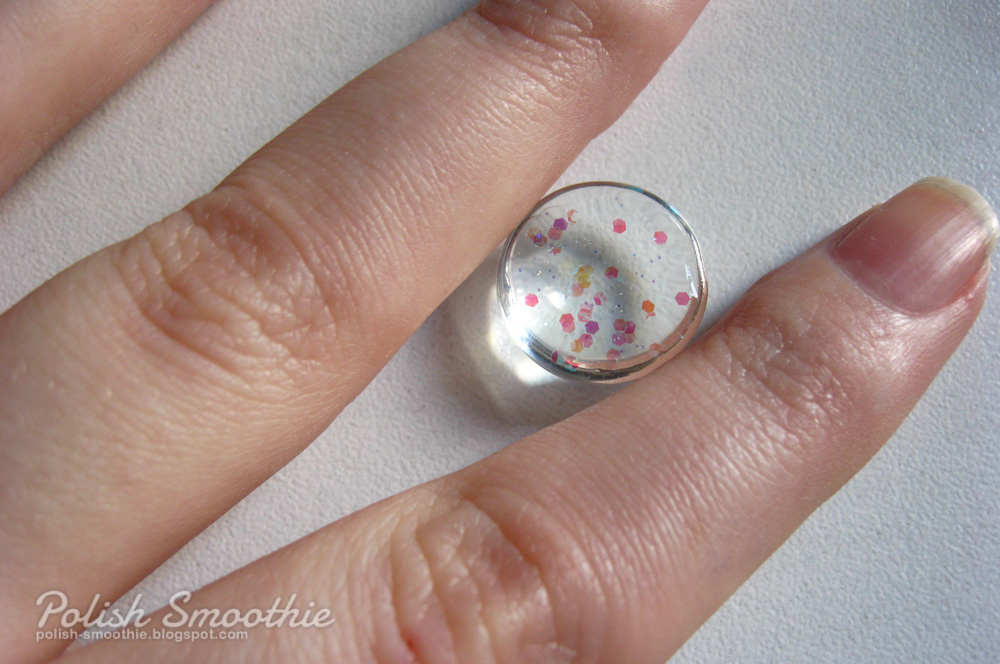
Here is a picture of one of my finished rings to show you what it looks like. I'm not a fan of big flashy statement rings so this size is perfect for me.
Once you have everything ready, you start with painting on the back of the cabochon. To avoid it sliding around everywhere, pin it between two of your fingers.
The catch to painting the cabochons is that you paint the layers in reverse.. For example, when painting your nails you'll want to start off with your base colour, and then add glitter. But for your jewelry, you will start with the glitter, like I have in the above picture. I'm starting with Essence Cool Breeze because I love using iridescent glitter for my jewelry.
Once you have your coat of glitter on, let it dry for a good while to avoid bubbles. If you make a mistake, don't fret! A bit of nail polish remover will get it right off. The cabochons are very easy to clean.

When your glitter is dry, you can add the background colour. In this case, I went with black, and I also made an additional ring with two coats of a holographic nail polish I have, Hema 826.
At this point, you are done with painting the cabochon. Let this dry very well, or the superglue might mess up the layers of polish.

Your cabochon is done drying, so now you can stick it on the ring base! Apply a small dot of superglue in the middle of your ring base. You really don't need a lot.
Now you can stick your cabochon in the ring base. Press it down with your fingers to spread around the glue, then grab your clothespin and clam it on the ring, like so:

Lay your ring with the clothespin upside down, so no bubbles will form. Now your ring is ready, but it needs to dry.
It's important to let the rings dry very well. I usually make them in the evening so they can dry overnight. So be patient and leave them alone for a while - they will be ready soon!

Ta-dah, you have a brand new, and super pretty ring!
Personally, I love to match my jewelry together, so I often make matching earrings for the rings I make. I will now show you how to make earrings.

Get your cabochons ready. Again, there are many different sizes and shapes for earrings. I personally like studs, so that is what I'll be showing you. I went for 10mm sized cabochons, but I found that 8mm and 12mm work well too. Make sure your earring posts aren't larger than the flat side of your cabochons.
These might be a bit trickier to paint, but just pin them between your fingers or hold them however you want so they don't slide around.

For this tutorial I am making simple earrings with the holographic polish I mentioned earlier, but if you want to make glitter earrings, it's the same as with the rings, meaning you'll have to paint your layers in reverse order.
So, paint on your polish(es) of choice and let them dry very well before gluing on the earring posts. When you think they are done drying, get the earring posts ready.

There are different ways to glue them on. Some prefer to apply a dab of glue on the back of the cabochons, but I prefer to put some glue on a piece of paper, lightly dab the flat end of the earring posts in it, and then press them on the back of the cabochons. Don't press too hard or you might ruin the layers of polish if they aren't dry enough.
Don't worry if there is a bit of glue flooded around the earring posts, because when it dries it won't be noticable.

Your earrings are almost done! I usually leave them drying like this overnight, but be sure to put them in a place where you can't accidentally knock them over. Also do not attempt to put any backings on them yet, leave that for when they are completely done drying.

When they are done drying, put the backings on! Earring posts usually come with their own backings, but since I didn't like them I ordered some rubber flower-shaped ones on Etsy.

Congratulations, you just made your own set of nail polish jewelry! How easy was that?
And don't forget there are endless possibilities with these, don't limit yourself to just glitter! You can use glequins, stamping, gradients, striping tape and dotting tools to come up with your own designs. Be creative and show them off to everyone you know. ;)
I hope you enjoyed reading my tutorial, and I hope it helped! Again, if you have any questions or comments, I'd love to hear them. And if this tutorial inspired you to make your own jewelry, I'd like to see them.
Wow i love your Tutorial ^^ i have been wanting to make Nail Polish Jewelry, Am going to Give it a Try
ReplyDeleteWill the jewelry disolve if out in the sun too long or if you are getting a manicure and some acetone spills on it? What about nicks and scratches?
ReplyDeleteI've being looking for a tutorial for this style of jewelry for so long - thank you!! :)
ReplyDeleteHow about if you put some double stick tape on a piece of paper, add the cabochon on the tape. That way, it won't move around and you won't get any polish on your fingers. Works for me. :)
ReplyDelete